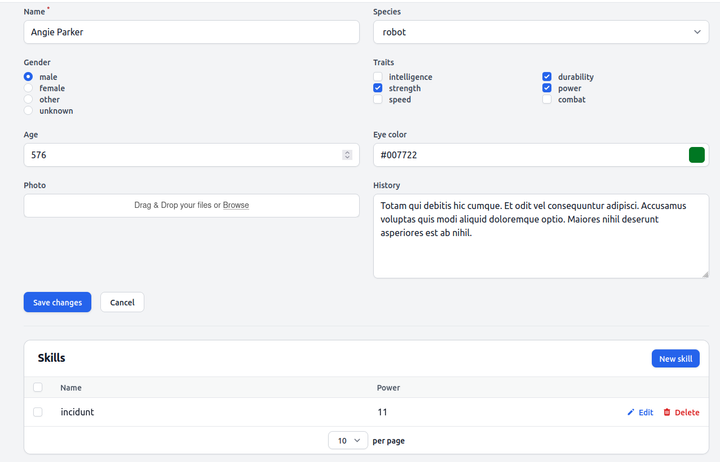
Using Laravel Filament
Table of Contents
If you just wish to learn about Filament, please read their documentation and check their demo repo. It will be faster than following my post.
Intro
I have used quite a few admin or CRUD generator kind of Laravel packages for rapid development in the past. Filament is youngest among them but it has quite a lot of things that I like about.
- open-source and free (unlike Nova or Backpack)
- stay in Laravel ecosystem; TALL stack (unlike Orchid)
- good documentation and active community
- enough form fields to use for any type of project
- easy to use table with filter, sorting
- good support for Eloquent's relationships
- come with navigation, pages, widgets, charts and notifications
- plenty of plugins (not hundreds or thousands, still pretty good amount)
- mainly it is easy to learn thanks to the documentation, demo project repo and existing plugins
So I have decided to use Filament for my future Laravel projects. This post is my journal/guide/log/notes of my learning and experimenting with Filament. My aim is to use Filament together with other packages I normally use. So my project will have other packages for APIs development, APIs integration, deployment, logging and so on. (I have trouble installing Laravel Module package so I have removed it for now. I will try to install it again and use Filament from Module in future.)
I have setup a Github repo mrlinnth/laravel-filament-starter for my project. If you are someone who prefer to read code instead of text, feel free to visit there instead. I update the README file with short to the point steps that I did.
I am gonna skip the followings in this post
- Setting up local environment for Laravel project on different OS
- Setting up VS Code for Laravel project on different OS
- Installing and setting up Laravel packages that I usually use
I am not even going to write about installing and setting up Filament. If you are using my repo then it's already installed. I plan to write separate posts for those how to setup topics in future.
If you want to read and follow this post, you will need to
- clone my repo mrlinnth/laravel-filament-starter
- checkout related branch for each step
- update .env with your DB info
- run
composer install - run
npm install - run
php artisan migrate - run
php artisan optimize
Step 1 - First CRUD
Branch : steps/01-first-crud
First I want to learn how to develop CRUD pages. I also want to see how Filament handles relationships. I decided to develop a superherodb.com inspired project since I am bored with Blog project.
Requirements
- User can create and update heroes.
- A hero can have many skills.
- A hero can belong to teams.
- A hero can be a leader of a team.
When I have requirements, I decide a DB structure
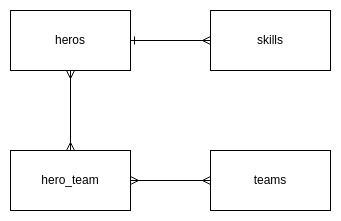
Project Initiate
Generate model, factory, migration and seed files
php artisan make:model -fms Hero
php artisan make:model -fms Skill
php artisan make:model -fms Team
Generate pivot table migration for hero_team
php artisan make:migration create_hero_team_table
Update the migration files
        Schema::create('heroes', function (Blueprint $table) {
            $table->id();
            $table->string('name'); // text
            $table->text('history'); // textarea
            $table->string('species'); // dropdown
            $table->string('gender'); // radio button
            $table->integer('age'); // number
            $table->string('eye_color'); // color picker
            $table->json('traits'); // group of checkbox
            $table->timestamps();
        });

        Schema::create('skills', function (Blueprint $table) {
            $table->id();
            $table->string('name'); // text
            $table->foreignId('hero_id')->constrained(); // dropdown
            $table->integer('power')->default(50); // number
            $table->timestamps();
        });

        Schema::create('teams', function (Blueprint $table) {
            $table->id();
            $table->string('name'); // text
            $table->text('story'); // wysiwyg or rich text editor
            $table->foreignId('leader_id')
                    ->constrained('heroes')
                    ->onUpdate('cascade')
                    ->onDelete('cascade');
            $table->timestamps();
        });

        Schema::create('hero_team', function (Blueprint $table) {
            $table->id();
            $table->foreignId('hero_id')->constrained();
            $table->foreignId('team_id')->constrained();
            $table->timestamps();
        });
I write down the form field type so that I don't have to think when I setup CRUD form later.
Run Migrate
php artisan migrate
Hero has species and traits attributes. They will be predefined but instead of hard coding them directly at form fields we can use Enum class. Spatie Laravel Enum package is very useful.
Generate and update Enum classes
php artisan make:enum SpeciesEnum
/**
 * @method static self human()
 * @method static self alien()
 * @method static self god()
 * @method static self robot()
 * @method static self mutant()
 * @method static self other()
 */
final class SpeciesEnum extends Enum
{
}
php artisan make:enum TraitsEnum
/**
 * @method static self intelligence()
 * @method static self strength()
 * @method static self speed()
 * @method static self durability()
 * @method static self power()
 * @method static self combat()
 */
final class TraitsEnum extends Enum
{
}
Update models with casts and relationship methods
Hero.php
<?php

namespace App\Models;

use App\Enums\SpeciesEnum;
use App\Enums\TraitsEnum;
use Illuminate\Database\Eloquent\Factories\HasFactory;
use Illuminate\Database\Eloquent\Model;

class Hero extends Model
{
    use HasFactory;

    protected $casts = [
        'species' => SpeciesEnum::class,
        'traits' => TraitsEnum::class.':collection,nullable',
    ];

    /**
     * The attributes that aren't mass assignable.
     *
     * @var array
     */
    protected $guarded = [];

    /**
     * Get the skills of the hero.
     */
    public function skills()
    {
        return $this->hasMany(Skill::class);
    }

    /**
     * The teams that belong to the hero.
     */
    public function teams()
    {
        return $this->belongsToMany(Team::class);
    }

    /**
     * Get the teams the hero is leader of.
     */
    public function leaderTeams()
    {
        return $this->hasMany(Team::class, 'leader_id');
    }
}
Skill.php
<?php

namespace App\Models;

use Illuminate\Database\Eloquent\Factories\HasFactory;
use Illuminate\Database\Eloquent\Model;

class Skill extends Model
{
    use HasFactory;

    /**
     * Get the hero that owns the skill.
     */
    public function hero()
    {
        return $this->belongsTo(Hero::class);
    }
}
Team.php
<?php

namespace App\Models;

use Illuminate\Database\Eloquent\Factories\HasFactory;
use Illuminate\Database\Eloquent\Model;

class Team extends Model
{
    use HasFactory;

    /**
     * The heroes that belong to the team.
     */
    public function heroes()
    {
        return $this->belongsToMany(Hero::class);
    }

    /**
     * Get the leader that owns the team.
     */
    public function leader()
    {
        return $this->belongsTo(Hero::class, 'leader_id');
    }
}
Generate CRUD
Filament resources
Filament provide 3 options for generating CRUD. Filament address entity/model as resource so I will follow.
- default : You will need to define the form fields for create and edit pages and table columns for listing page. Create and edit form is separate page. Delete button is not showing at listing page.
- simple : You still need to define the form fields and table columns. Create and edit form is a modal box now. Delete button exists at listing page. Good for resource with 2,3 small attributes. Not suitable for resource with many attributes or long text attribute.
- generate : Form fields and table columns are auto generated. The rest is same as default. Useful if majority of the attributes are common type (eg: text, number). You won't need to create everything from scratch. You just need to update the generated code as you want. You need doctrine/dbal package for this.
php artisan make:filament-resource Hero
    public static function form(Form $form): Form
    {
        return $form
            ->schema([
                Forms\Components\TextInput::make('name')->required(),
                Forms\Components\Select::make('species')
                ->options(SpeciesEnum::toArray()),
                Forms\Components\Radio::make('gender')
                ->options([
                    'male' => 'Male',
                    'female' => 'Female',
                    'other' => 'Other'
                ]),
                Forms\Components\CheckboxList::make('traits')
                ->options(TraitsEnum::toArray())
                ->columns(2),
                Forms\Components\TextInput::make('age')->numeric(),
                Forms\Components\ColorPicker::make('eye_color'),
                Forms\Components\Textarea::make('history')->columnSpan('full'),
            ]);
    }

    public static function table(Table $table): Table
    {
        return $table
            ->columns([
                Tables\Columns\TextColumn::make('name'),
                Tables\Columns\TextColumn::make('species'),
                Tables\Columns\TextColumn::make('gender'),
                Tables\Columns\TextColumn::make('age'),
            ])
            ->filters([
                //
            ])
            ->actions([
                Tables\Actions\EditAction::make(),
            ])
            ->bulkActions([
                Tables\Actions\DeleteBulkAction::make(),
            ]);
    }
php artisan make:filament-resource Skill --simple
    public static function form(Form $form): Form
    {
        return $form
            ->schema([
                Forms\Components\TextInput::make('name')->required(),
                Forms\Components\Select::make('hero_id')->relationship('hero', 'name'),
                Forms\Components\TextInput::make('power')->numeric(),
            ]);
    }

    public static function table(Table $table): Table
    {
        return $table
            ->columns([
                Tables\Columns\TextColumn::make('name'),
                Tables\Columns\TextColumn::make('hero.name'),
                Tables\Columns\TextColumn::make('power'),
            ])
            ->filters([
                //
            ])
            ->actions([
                Tables\Actions\EditAction::make(),
                Tables\Actions\DeleteAction::make(),
            ])
            ->bulkActions([
                Tables\Actions\DeleteBulkAction::make(),
            ]);
    }
php artisan make:filament-resource Team --generate
    public static function form(Form $form): Form
    {
        return $form
            ->schema([
                Forms\Components\TextInput::make('name')->required(),
                Forms\Components\Select::make('leader_id')->relationship('leader', 'name'),
                Forms\Components\RichEditor::make('story')->columnSpan('full'),
            ]);
    }

    public static function table(Table $table): Table
    {
        return $table
            ->columns([
                Tables\Columns\TextColumn::make('name'),
                Tables\Columns\TextColumn::make('leader.name'),
            ])
            ->filters([
                //
            ])
            ->actions([
                Tables\Actions\EditAction::make(),
            ])
            ->bulkActions([
                Tables\Actions\DeleteBulkAction::make(),
            ]);
    }
- I update the generated fields and columns as I like.
- I use
columnSpan('full')method for the long text fields. - Skill and Team resources have hero as select drop down for the relationship.
- Skill table actions() method has DeleteAction. So if we add it to other two resource, they will also show delete action at listing page.
- Hero resource has radio buttons, checkbox group, color picker.
- Team has rich text (wysiwyg) editor.
You should be able to create, edit, delete the resources. But you will need to create user to login and access Filament admin dashboard. Or use my dummy data it already has test user account.
Create user
php artisan make:filament-user and enter details
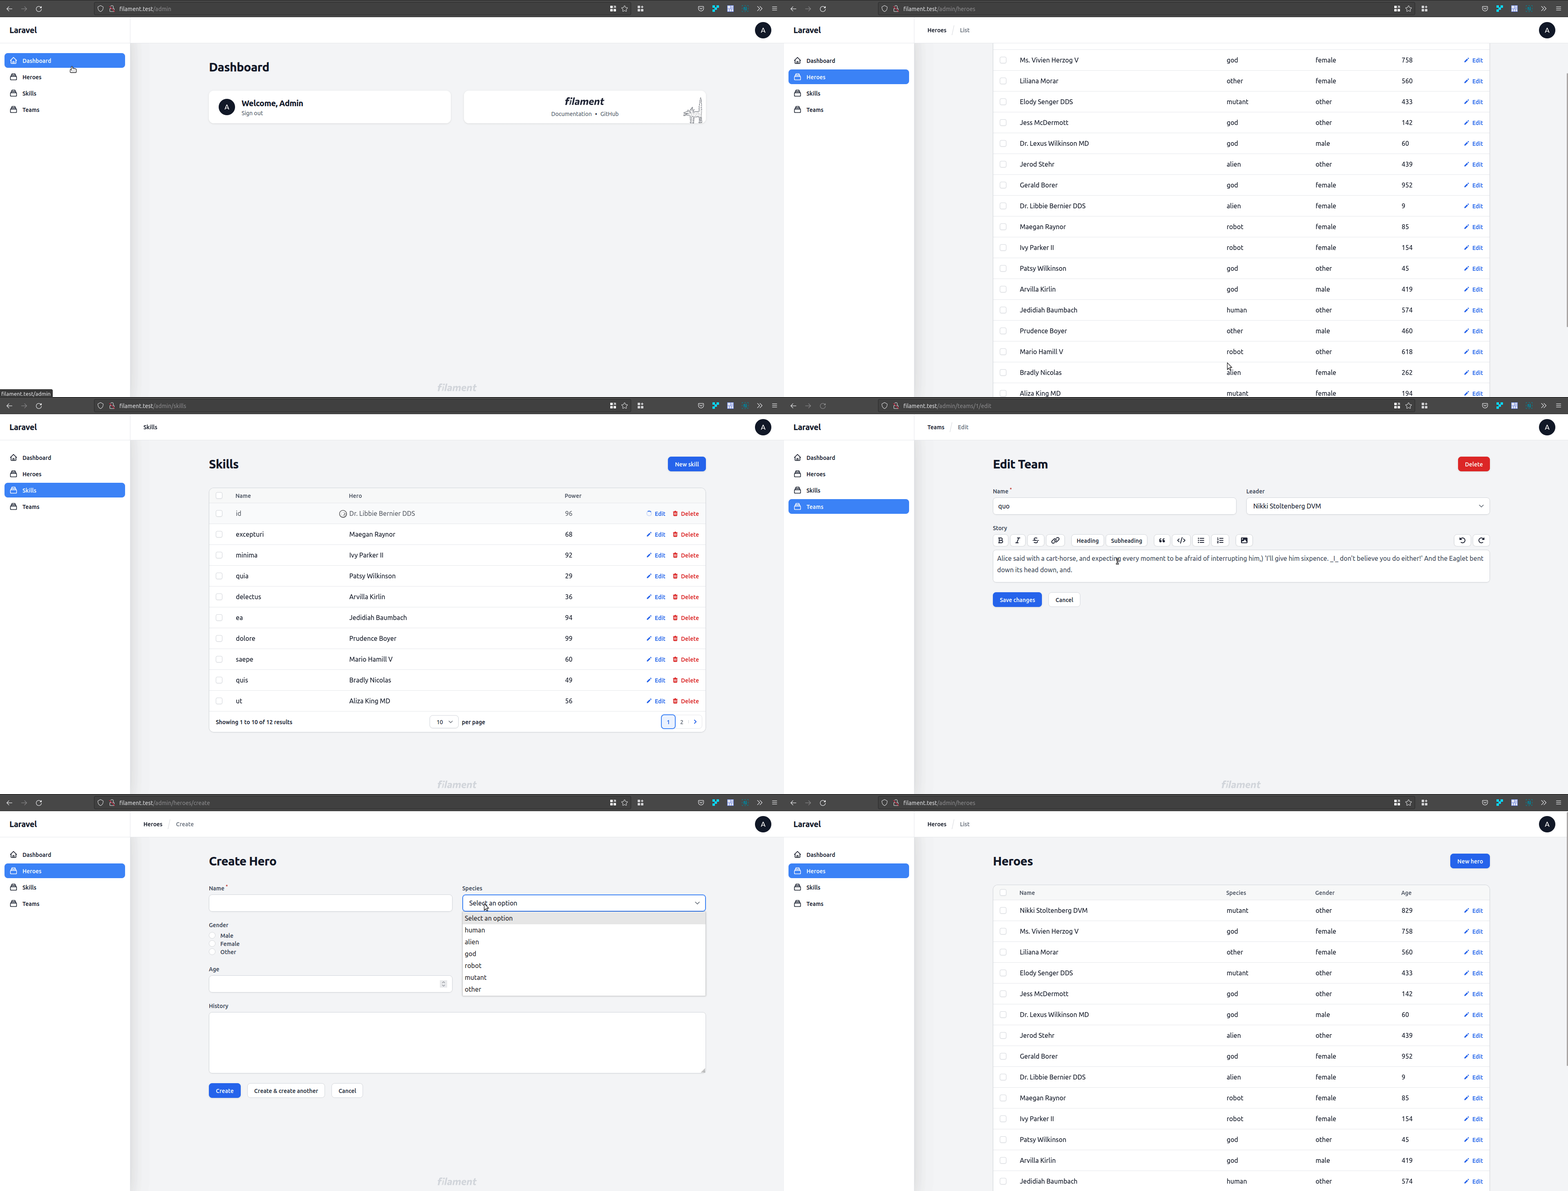
Visit yourdomain/admin and login. You should see this.

Dummy data
I use Laravel's Factory and Seeder classes.
I update the HeroFactory, SkillFactory and TeamFactory. I update TeamSeeder and SkillSeeder. Since TeamFactory will also generate Heroes, I don't use HeroSeeder.
I update DatabaseSeeder with test user and call TeamSeeder and SkillSeeder.
Run php artisan migrate:fresh --seed to clear the database, run migrations and seeders.
Visit yourdomain/admin and login
- username : admin@mail.com
- password : password
You will see dummy data records for heroes, skills and teams.
File upload
Let's upload a photo for hero resource. With the help of Spatie Media Library package and Filament Media Library plugin package, we do not need to update hero table structure or anything.
To add file upload field to hero create/edit form, update form() method $form->schema parameter array in HeroResource.php with following
Forms\Components\SpatieMediaLibraryFileUpload::make('photo')
->collection('hero'),
It is better to define collection() parameter, since it is how we will associate the uploaded file with our resource.
To show the image in table column, update table() method $table->columns parameter array in HeroResource.php with following
Tables\Columns\SpatieMediaLibraryImageColumn::make('photo')
->collection('hero'),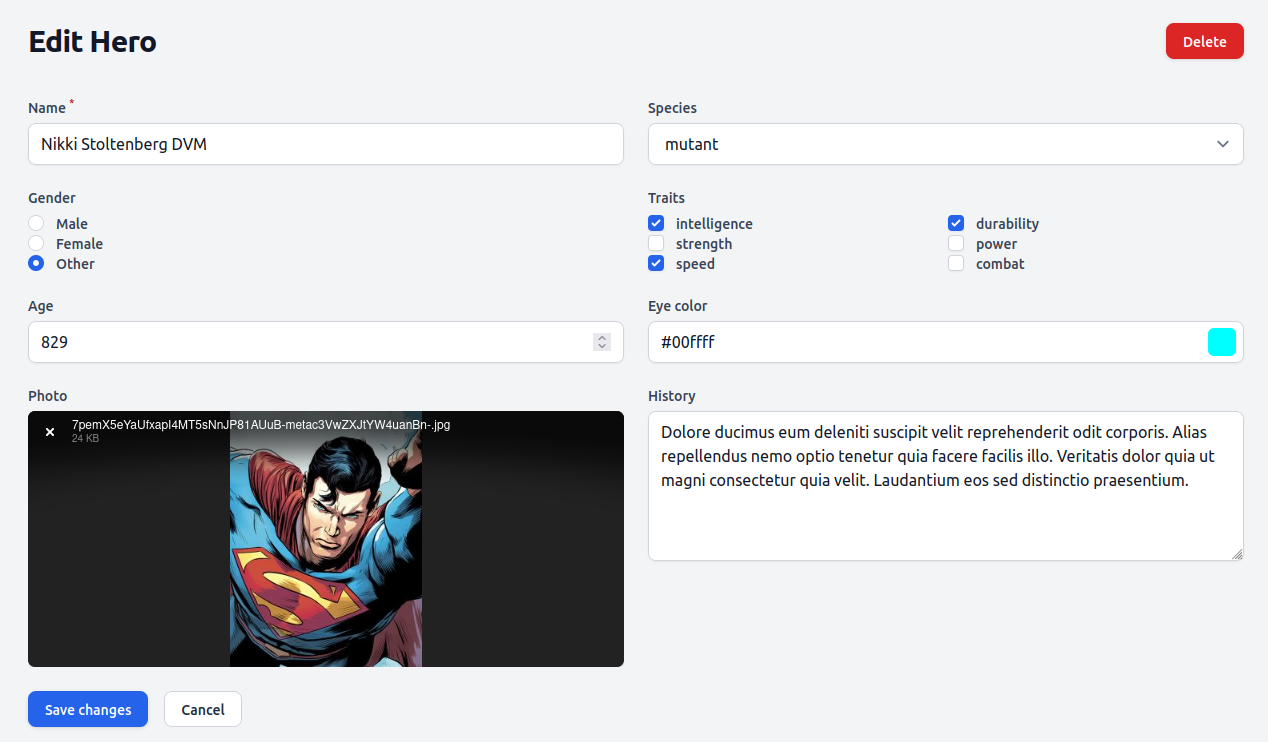

Relationships
One to many relationship
Hero and skill have one to many relationship. Since a skill can only belong to one hero, we need to select hero when a skill is created. Relationship name is hero and foreign key column is hero_id.
Same with Hero and Team. A team can only have one hero as leader so we need to select leader when creating a team. Relationship name is leader and foreign key column is leader_id.
Necessary codes are already added in previous step while updating the generated resource files.
In SkillResource.php
Forms\Components\Select::make('hero_id')->relationship('hero', 'name'),In TeamResource.php
Forms\Components\Select::make('leader_id')->relationship('leader', 'name'),To show relationship object's attribute in table, you can just use relationship method name with . dot notation. Check the leader name column in TeamResource.php.
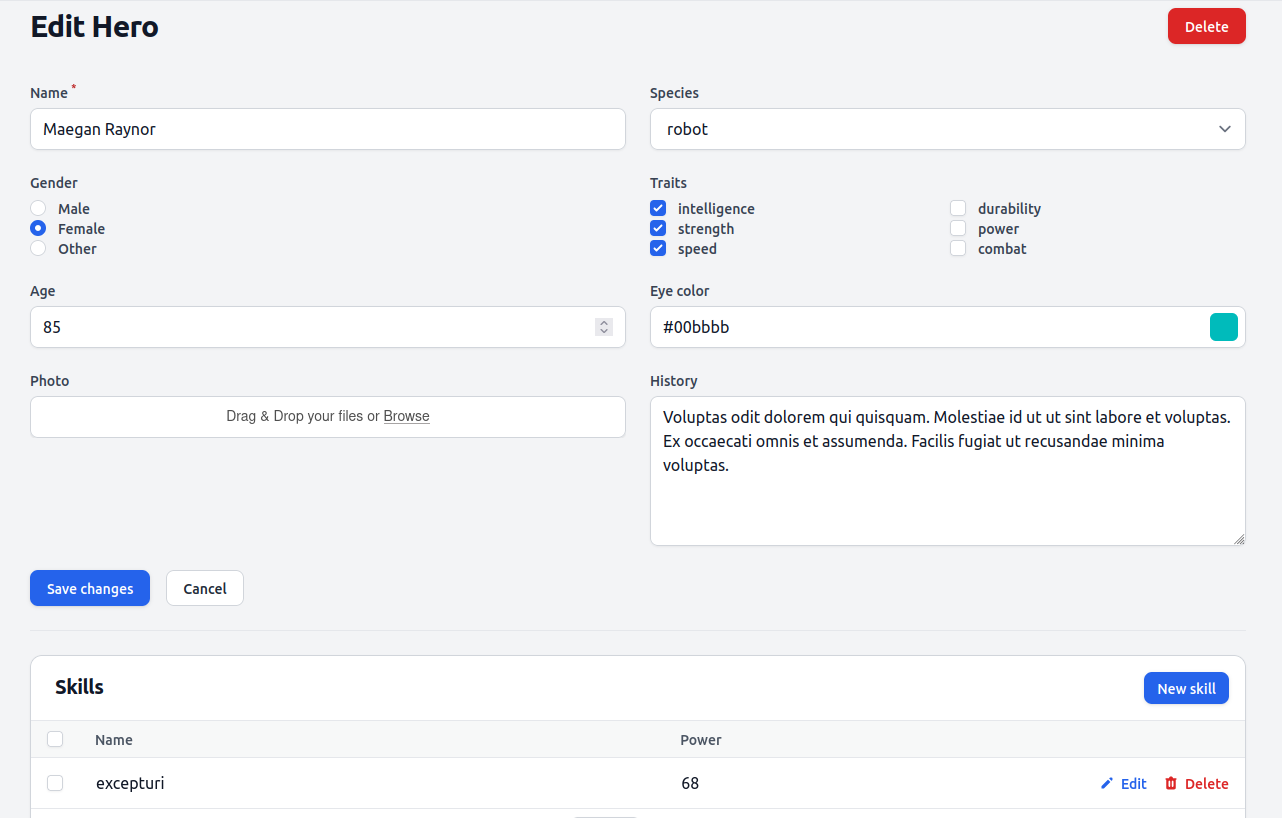
It is not very convenient for user to create hero and then create many skills for the hero one by one at different page. Creating all the skills of the hero while creating the hero provides a better user experience.
We can use Filament relation manger feature for that. We will need skill relation manager for the hero resource.
Relation manager
php artisan make:filament-relation-manager HeroResource skills name
class SkillsRelationManager extends RelationManager
{
    protected static string $relationship = 'skills';

    protected static ?string $recordTitleAttribute = 'name';

    public static function form(Form $form): Form
    {
        return $form
            ->schema([
                Forms\Components\TextInput::make('name')
                    ->required()
                    ->maxLength(255),
                Forms\Components\TextInput::make('power')->numeric(),
            ]);
    }

    public static function table(Table $table): Table
    {
        return $table
            ->columns([
                Tables\Columns\TextColumn::make('name'),
                Tables\Columns\TextColumn::make('power'),
            ])
            ->filters([
                //
            ])
            ->headerActions([
                Tables\Actions\CreateAction::make(),
            ])
            ->actions([
                Tables\Actions\EditAction::make(),
                Tables\Actions\DeleteAction::make(),
            ])
            ->bulkActions([
                Tables\Actions\DeleteBulkAction::make(),
            ]);
    }
}
After generating and updating the relation manager, we need to update getRelations() method of hero resource as well.
    public static function getRelations(): array
    {
        return [
            RelationManagers\SkillsRelationManager::class,
        ];
    }
A skills table and new skill button will appear at hero create/edit form.
Many to many relationship
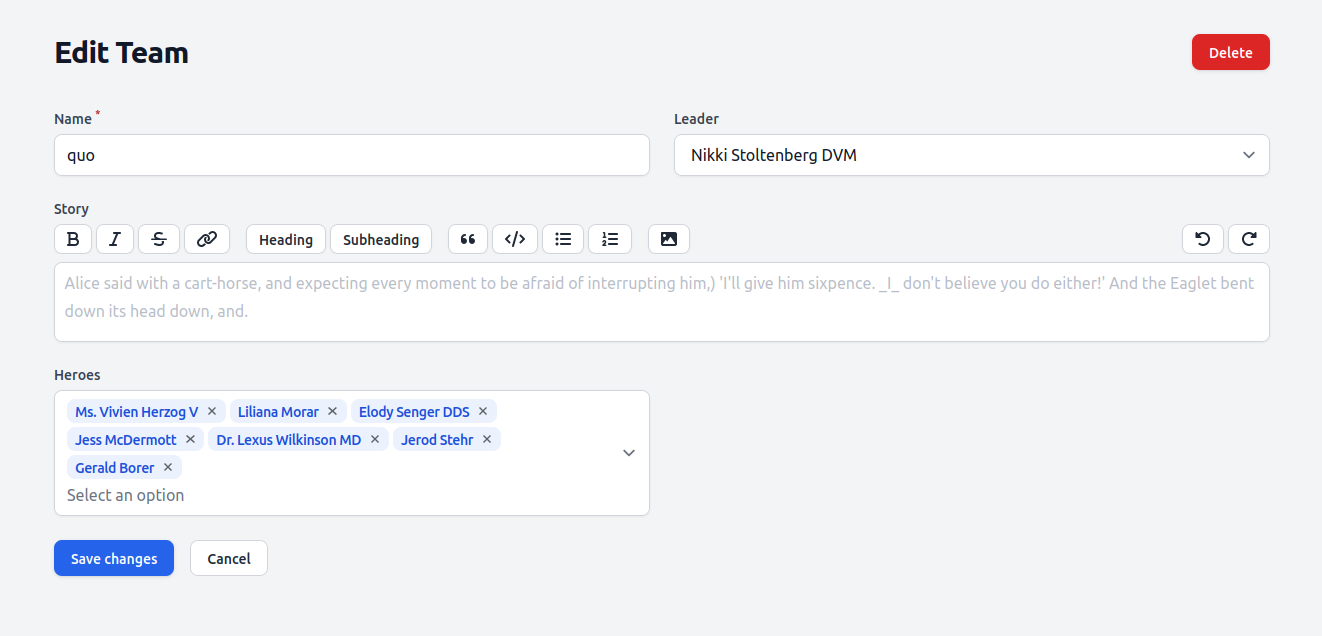
Team and hero have many to many relationship. We can either
- add hero to one or more teams at hero create/edit form or
- assign heroes at team create/edit form
I like the later because most of the time we will be creating hero before creating team.
We just update TeamResource.php
public static function form(Form $form): Form
{
    return $form
        ->schema([
            //...
            Forms\Components\MultiSelect::make('heroes')
            ->relationship('heroes', 'name')
        ]);
}
View Resource
By default Filament doesn't generate view page since we will see all data at edit form anyway. If you want separate view page, you have to mention it during resource generation command. Or run generate view page command for existing resource.
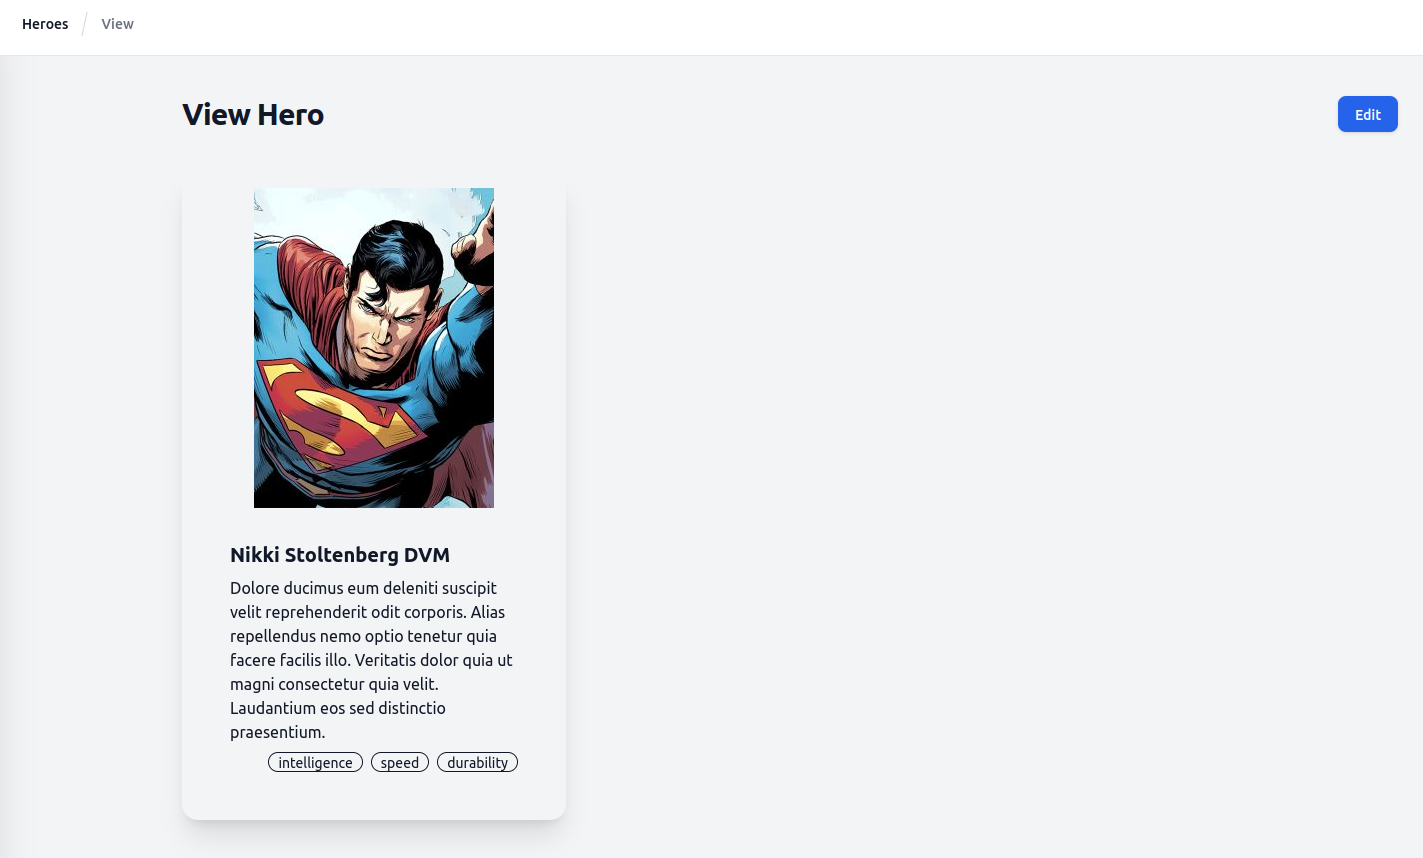
I will create own view page for hero resource.
Generate view page and update
php artisan make:filament-page ViewHero --resource=HeroResource --type=ViewRecord
You will get a new ViewHero.php file under HeroResource\pages\ directory.
You need to add the view page to getPages() method in HeroResource.php
    public static function getPages(): array
    {
        return [
            'index' => Pages\ListHeroes::route('/'),
            'create' => Pages\CreateHero::route('/create'),
            'view' => Pages\ViewHero::route('/{record}'),
            'edit' => Pages\EditHero::route('/{record}/edit'),
        ];
    }
Now when you click on a hero record, it will not bring you to edit form. You will still see all attributes in read-only state in form layout.
To design your own custom view page, define $view property in ViewHero.php and create your own custom blade for the view.
class ViewHero extends ViewRecord
{
    protected static string $resource = HeroResource::class;

    protected static string $view = 'filament.resources.heroes.pages.view';
}
You can use $record variable to get the resource object data in the blade file.
<x-filament::page>
    <div class="card w-96 shadow-xl p-4">
        <figure><img src="{{ $record->getFirstMediaUrl('hero') }}" alt="{{ $record->name }}" />
        </figure>
        <div class="card-body">
            <h2 class="card-title">{{ $record->name }}</h2>
            <p>{{ $record->history }}</p>
            <div class="justify-end card-actions">
                @foreach ($record->traits as $trait)
                    <div class="badge badge-outline">{{ $trait }}</div>
                @endforeach
            </div>
        </div>
    </div>
</x-filament::page>
And you will get your custom view page for the hero.
Step 2 - Roles Permissions
Branch : steps/02-roles-permissions
Let's add common features that every project has such as roles, permission, log in, register, impersonate, settings, etc.
Custom command
There will be time you found that your database has many unclean data, bad data and want to reset. It is always better to have a command to help you with that.
You can reset the database tables, seed data, delete test uploaded files, cache files, clear log and any other things that you want in the command.
Generate a custom command class php artisan make:command Project\FactoryReset
class FactoryReset extends Command
{
    /**
     * The name and signature of the console command.
     *
     * @var string
     */
    protected $signature = 'project:factory-reset';

    /**
     * The console command description.
     *
     * @var string
     */
    protected $description = 'Drop tables, migrate, seed, delete uploaded files, clear cache and log';

    /**
     * Execute the console command.
     *
     * @return int
     */
    public function handle()
    {
        $this->call('migrate:fresh', ['--seed'=>true]);
        Storage::deleteDirectory('public');
        Storage::disk('public')->put('.gitignore', "*\n!.gitignore\n");
        $this->info('Uploaded files deleted');
        $this->call('optimize:clear');
        $logFilePath = storage_path('logs/laravel.log');
        system('truncate -s 0 ' . $logFilePath);
        $this->info('Log file truncated');
        $this->call('shield:install', ['--fresh'=>true]);
        return Command::SUCCESS;
    }
}
Filament Plugins
I use few plugins for user authentication and authorization. Using Filament plugins is pretty straightforward and same as using any other Laravel or composer package.
Environment indicator : so we will not be mistaken between dev and prod environments
Filament shield : for roles and permissions management. It is basically ready made CRUD resources for the famous Spatie's permission package
Filament impersonate : to impersonate as other user
Filament breezy : for log in, register, profile pages with optional 2FA
Install the packages, follow installation instructions, publish config files and update as needed.
Settings Package
The repo already has Filament settings plugin which uses Spatie's Settings package. Follow the package installation instruction and publish config files. Let's create hero gender options as setting instead of hard coded values.
Create a new class for the setting HeroSettings.php
<?php

namespace App\Settings;

use Spatie\LaravelSettings\Settings;

class HeroSettings extends Settings
{
    public string $gender_options;

    public static function group(): string
    {
        return 'hero';
    }
}
Update settings array in config/settings.php
    'settings' => [
        App\Settings\HeroSettings::class,
    ],
Generate migration for the setting with default values
php artisan make:settings-migration CreateHeroSettings
Setting migration file will be generated in database/settings directory
<?php

use Spatie\LaravelSettings\Migrations\SettingsMigration;

class CreateHeroSettings extends SettingsMigration
{
    public function up(): void
    {
        $this->migrator->add('hero.gender_options', 'male, female, other');
    }
}
Run php artisan migrate
Generate Filament setting page
php artisan make:filament-settings-page ManageHero HeroSettings
Update Pages/ManageHero.php
class ManageHero extends SettingsPage
{
    protected static ?string $navigationIcon = 'heroicon-o-cog';

    protected static string $settings = HeroSettings::class;

    protected static ?string $navigationGroup = 'Administration';

    protected function getFormSchema(): array
    {
        return [
            TextInput::make('gender_options')
            ->helperText('Separate each option with comma (,)')
            ->required(),
        ];
    }
}
To use the setting in hero form, update form() method in Resources/HeroResource.php
    public static function form(Form $form): Form
    {
        $heroSettings = new HeroSettings();
        $genderOptions = str_replace(', ', ',', $heroSettings->gender_options);
        $genderOptions = explode(',', $genderOptions);
        $genderOptions = array_combine($genderOptions, $genderOptions);
        return $form
            ->schema([
                // ...
                Forms\Components\Radio::make('gender')
                ->options($genderOptions),
                // ...
            ]);
    }
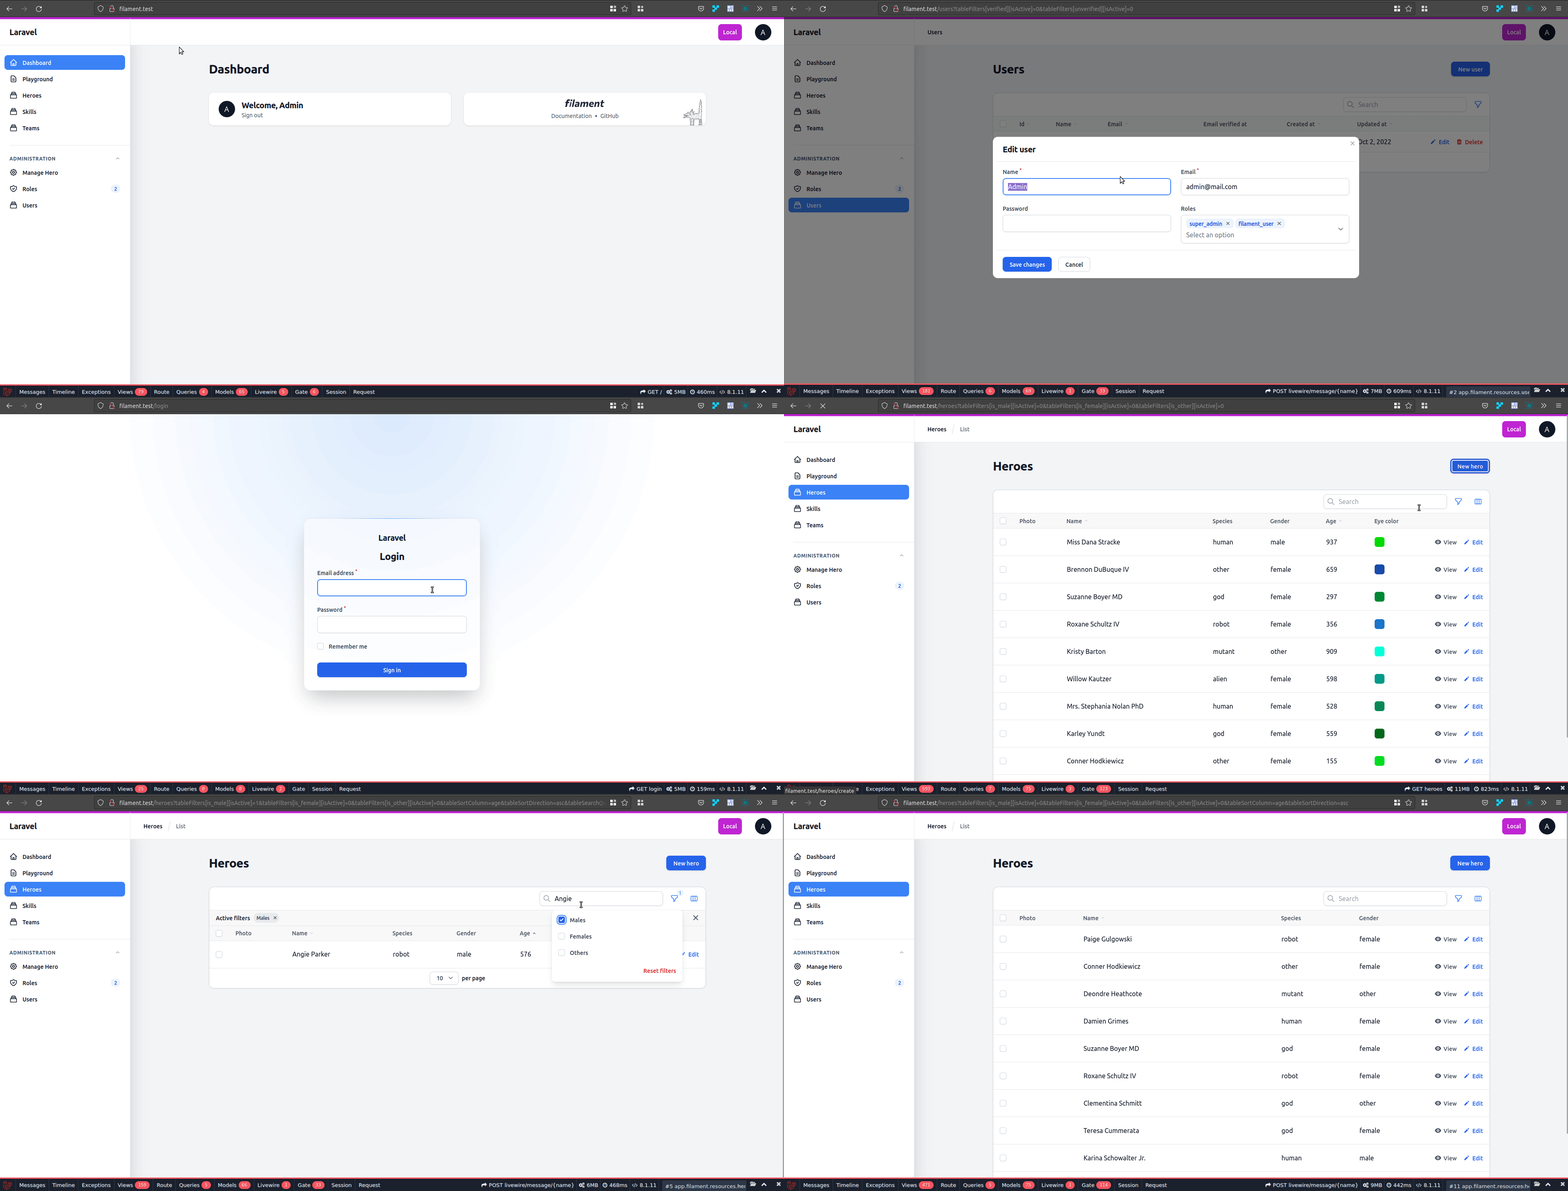
Listing table filter, sort and search
Update table() method in Resources/HeroResource.php
    public static function table(Table $table): Table
    {
        return $table
            ->columns([
                Tables\Columns\SpatieMediaLibraryImageColumn::make('photo')
                ->collection('hero')
                ->conversion('thumb'),
                Tables\Columns\TextColumn::make('name')->sortable()->searchable(),
                Tables\Columns\TextColumn::make('species')->searchable(),
                Tables\Columns\TextColumn::make('gender'),
                Tables\Columns\TextColumn::make('age')->sortable()->toggleable(),
                Tables\Columns\ColorColumn::make('eye_color')->toggleable(),
            ])
            ->filters([
                Tables\Filters\Filter::make('is_male')
                ->label('Males')
                ->query(fn (Builder $query): Builder => $query->where('gender', 'male')),
                Tables\Filters\Filter::make('is_female')
                ->label('Females')
                ->query(fn (Builder $query): Builder => $query->where('gender', 'female')),
                Tables\Filters\Filter::make('is_other')
                ->label('Others')
                ->query(fn (Builder $query): Builder => $query->where('gender', 'other')),
            ])
            ->actions([
                Tables\Actions\ViewAction::make(),
                Tables\Actions\EditAction::make(),
            ])
            ->bulkActions([
                Tables\Actions\DeleteBulkAction::make(),
            ]);
    }
Step 3 - JSON API
Branch : steps/03-json-api
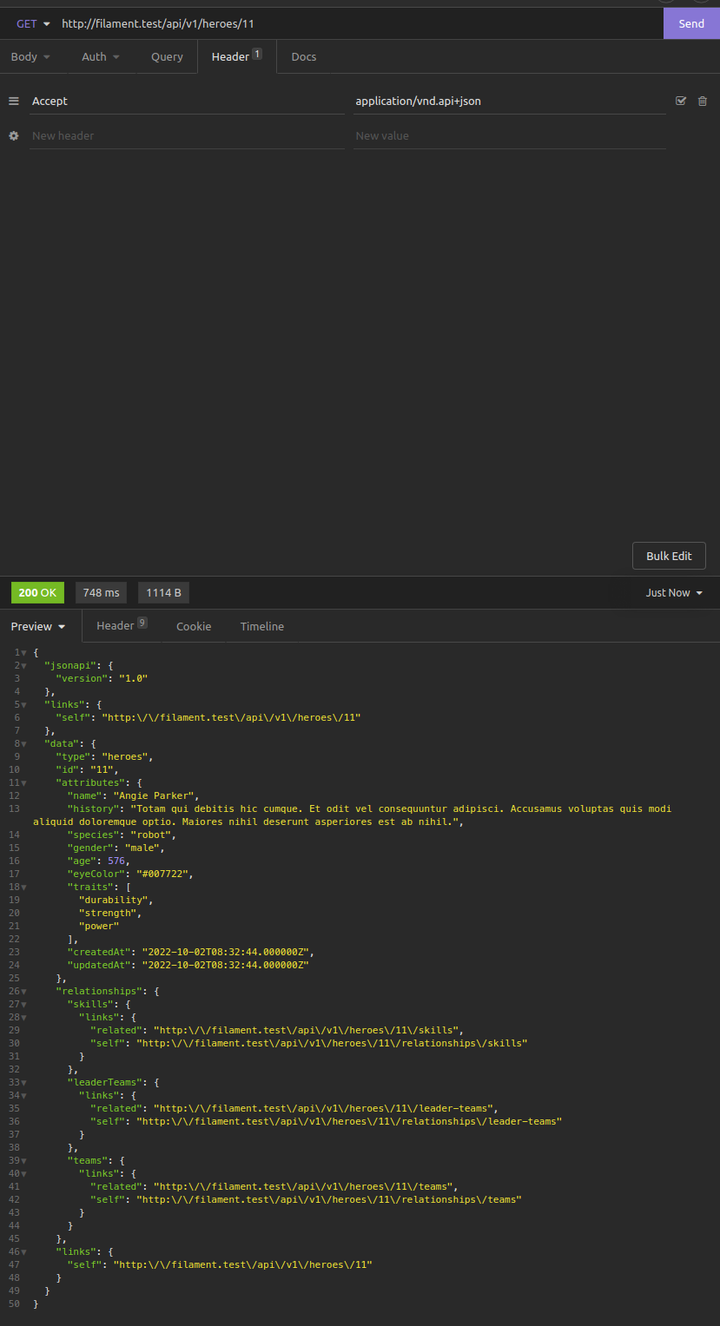
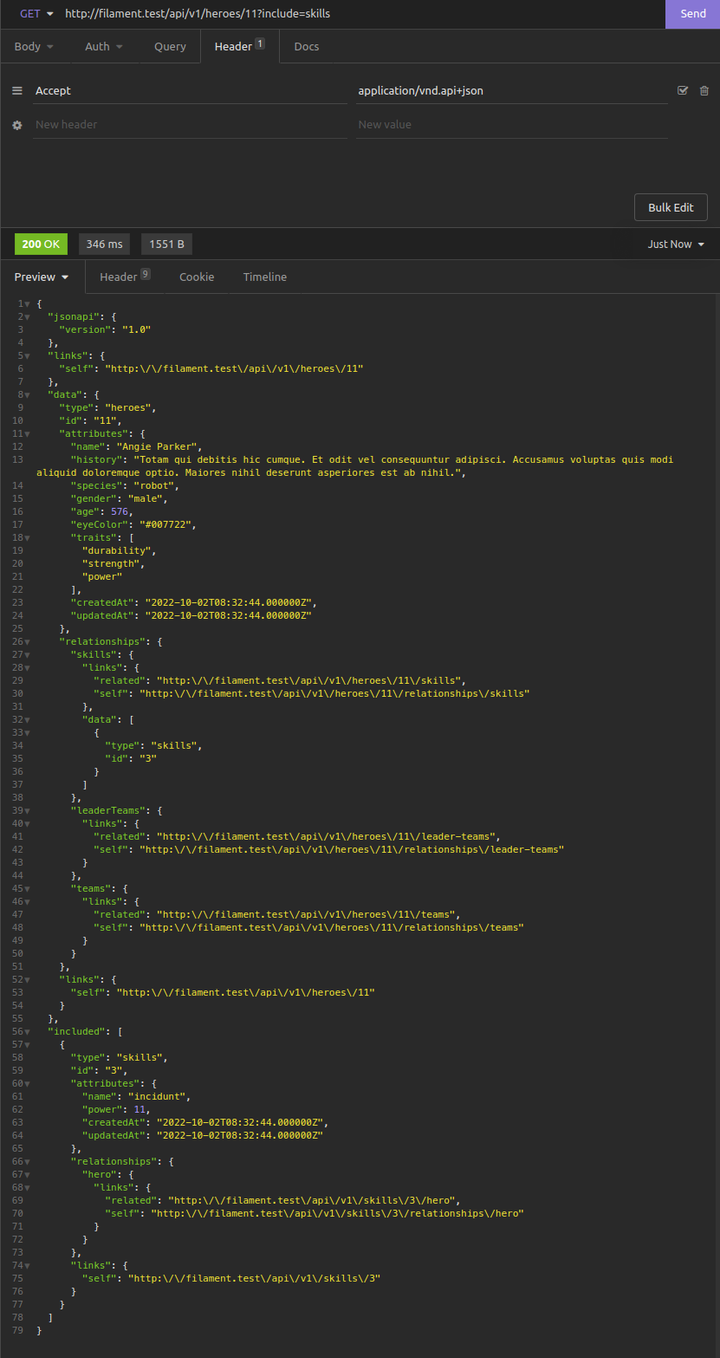
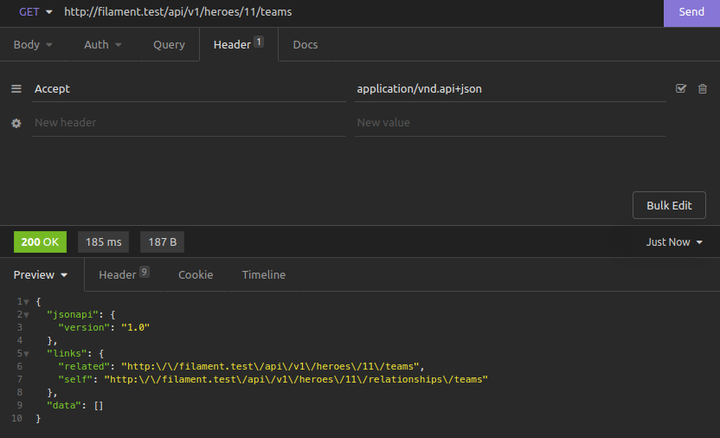
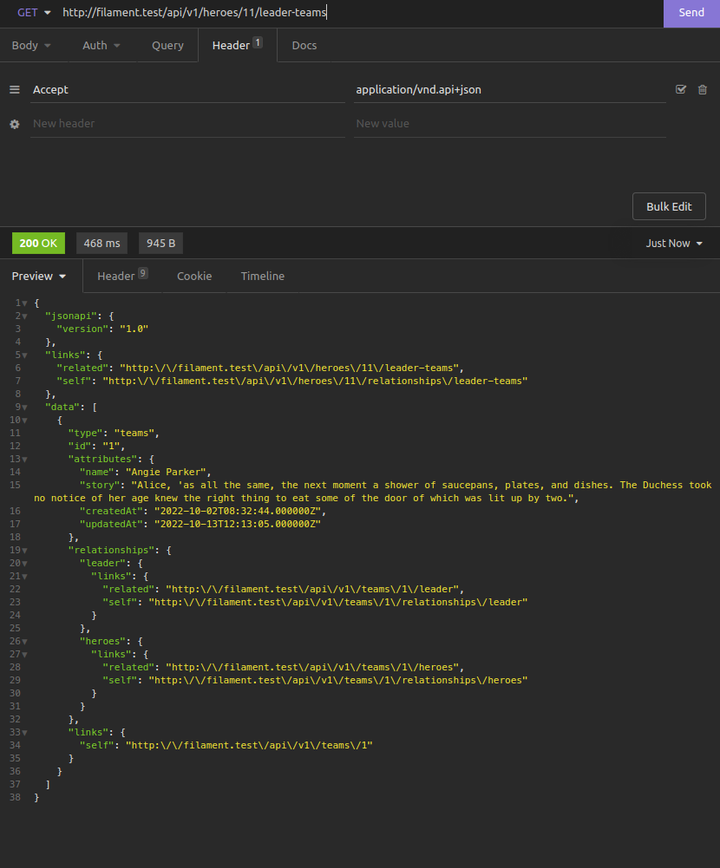
The project already has Laravel JSON API package installed for developing APIs. Make sure package config file is publish and Exception handler is updated.
Hero API end points
Generate new API server php artisan jsonapi:server v1
Update servers array in config/jsonapi.php
    'servers' => [
       'v1' => \App\JsonApi\V1\Server::class,
    ],
Generate API schema for heroes php artisan jsonapi:schema heroes
Generate skills schema php artisan jsonapi:schema skills
Generate teams schema php artisan jsonapi:schema teams
Update V1/Server.php
    protected function allSchemas(): array
    {
        return [
            HeroSchema::class,
            SkillSchema::class,
            TeamSchema::class,
        ];
    }
Update V1/HeroSchema.php
    public function fields(): array
    {
        return [
            ID::make(),
            Str::make('name')->sortable(),
            Str::make('history'),
            Str::make('species'),
            Str::make('gender'),
            Number::make('age')->sortable(),
            Str::make('eyeColor'),
            ArrayList::make('traits'),
            HasMany::make('skills')->readOnly(),
            HasMany::make('leaderTeams')->type('teams')->readOnly(),
            BelongsToMany::make('teams')->readOnly(),
            DateTime::make('createdAt')->sortable()->readOnly(),
            DateTime::make('updatedAt')->sortable()->readOnly(),
        ];
    }
Update V1/SkillSchema.php
    public function fields(): array
    {
        return [
            ID::make(),
            Str::make('name'),
            Number::make('power'),
            BelongsTo::make('hero')->readOnly(),
            DateTime::make('createdAt')->sortable()->readOnly(),
            DateTime::make('updatedAt')->sortable()->readOnly(),
        ];
    }
Update V1/TeamSchema.php
    public function fields(): array
    {
        return [
            ID::make(),
            Str::make('name'),
            Str::make('name')->on('leader'),
            Str::make('story'),
            BelongsTo::make('leader')->readOnly(),
            BelongsToMany::make('heroes')->readOnly(),
            DateTime::make('createdAt')->sortable()->readOnly(),
            DateTime::make('updatedAt')->sortable()->readOnly(),
        ];
    }
Update api.php with Json API server v1 route. Json API Route relations are either hasMany or hasOne.
JsonApiRoute::server('v1')->prefix('v1')->resources(function ($server) {
    $server->resource('heroes', JsonApiController::class)
    ->readOnly()
    ->relationships(function ($relations) {
        $relations->hasMany('skills')->readOnly();
        $relations->hasMany('leaderTeams')->readOnly();
        $relations->hasMany('teams')->readOnly();
    });
});
Create or update HeroPolicy.php class
    /**
     * Determine whether the user can view the model.
     * Notice we've made the $user argument nullable.
     * This means the method will be called if there is no authenticated user.
     *
     * @param  \App\Models\User  $user
     * @param  \App\Models\Hero  $hero
     * @return \Illuminate\Auth\Access\Response|bool
     */
    public function view(?User $user, Hero $hero)
    {
        if (empty($user)) {
            return true;
        }

        return $user->can('view_hero');
    }

    /**
     * Determine whether the user can view the hero skills
     *
     * @param  \App\Models\User  $user
     * @param  \App\Models\Hero  $hero
     * @return \Illuminate\Auth\Access\Response|bool
     */
    public function viewSkills(?User $user, Hero $hero)
    {
        return $this->view($user, $hero);
    }

    /**
     * Determine whether the user can view the teams which the hero is leading
     *
     * @param  \App\Models\User  $user
     * @param  \App\Models\Hero  $hero
     * @return \Illuminate\Auth\Access\Response|bool
     */
    public function viewLeaderTeams(?User $user, Hero $hero)
    {
        return $this->view($user, $hero);
    }

    /**
     * Determine whether the user can view the teams which the hero is member
     *
     * @param  \App\Models\User  $user
     * @param  \App\Models\Hero  $hero
     * @return \Illuminate\Auth\Access\Response|bool
     */
    public function viewTeams(?User $user, Hero $hero)
    {
        return $this->view($user, $hero);
    }
This is all for Laravel Filament guide. We generated CRUD resource pages, used relationships, used packages, setup authentication and authorizations and created API endpoints.

